This page explains how to issue an invoice to a customer from Merchant Portal and is part of a comprehensive Merchant Portal user guide that is available here.
Invoices
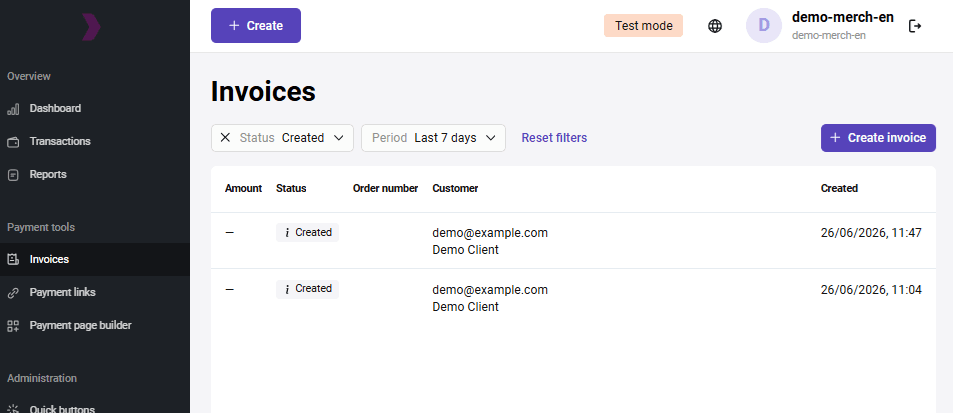
You can issue a payment invoice to the customer for goods or services via email. To do this, use the Invoices section of the Personal Area. After issuing the invoice, the customer receives an email and follows the link in it to the payment page.
On this page you can do the following:
- send invoice to the customer
- perform test payment
- find invoices by filter
- view invoice information
- cancel invoice
- duplicate invoice
- resend invoice
Sending invoice
To issue an invoice to a customer and send them a link to the payment page by email, go to the Invoices section of the Personal Area and click Create invoice.
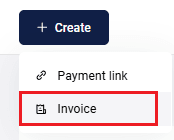
You can also do this by clicking the Create button at the top of the Personal Area and selecting Invoice.
The page for entering invoice parameters will be displayed:
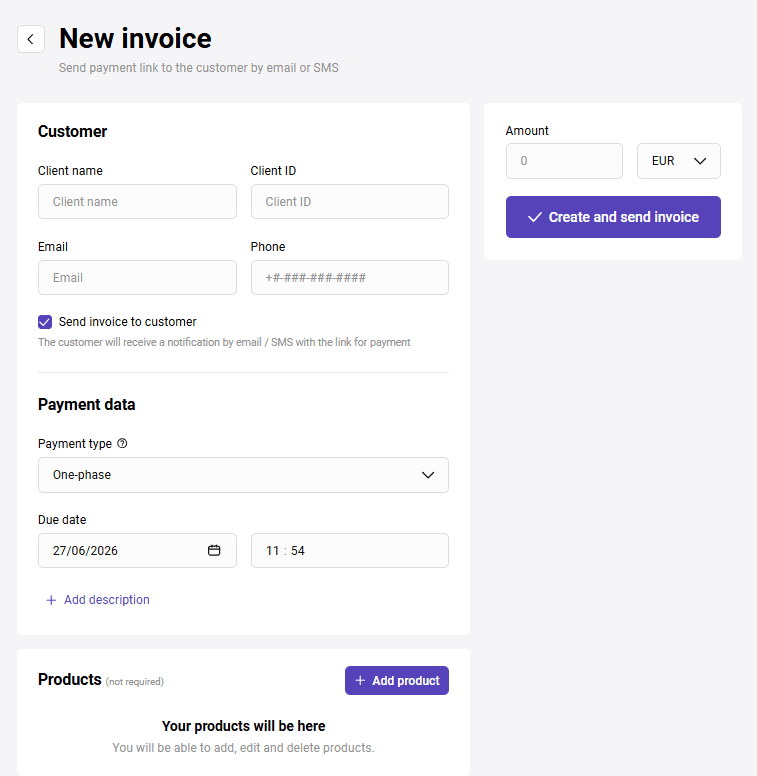
Set the parameters according to the table below.
| Parameter | Description |
|---|---|
| Client name | Customer's last name, first name, and patronymic. The data entered in this field is displayed in the email containing the link to the payment page. |
| Client ID | Client number in the store system. |
| Email address to which the payment link will be sent. | |
| Phone | Customer's phone number to which the payment link will be sent in an SMS. |
| Send invoice to customer | If this check box is selected, the customer will receive a notification by email / SMS with the link for payment. |
| Order number | Order number in the merchant's system. |
| Payment type | Choose one of two options:
|
| Due date | Specify the date and time until which the invoice can be paid. After this period expires, it will be impossible to pay the issued invoice. |
| Payment description | Free-form payment description. |
| Amount | Specify the payment amount. If the order contains a pre-filled shopping cart, this field is filled automatically. |
Click the Create and send invoice button. If sent successfully, a link to the payment form will be displayed below:
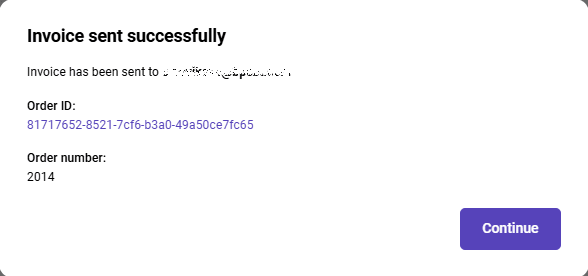
Click Continue to open the invoice information page.
Adding a shopping cart to invoice
When creating an invoice, you can specify a shopping cart for the order. The Products section is located below the invoice creation form:

-
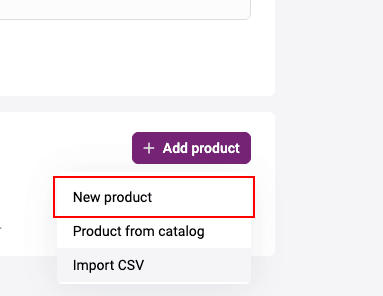
To add a product to the shopping cart, click on the Add product button and select New product.
A form with the parameters of the product being added will be displayed.

-
Fill in the required fields according to the table below.
Field Description Name Product/service name. Mandatory field. Article The vendor code of the product. Mandatory field. Qty The number of units of the product. Mandatory field. Measure Units of measurement, for example: L – liters, pcs. – pieces. Mandatory field. Price Price of one product unit. Mandatory field. Amount Total amount for all units of one product item. Calculated automatically when filling in the Price and Qty fields. Click Add product.
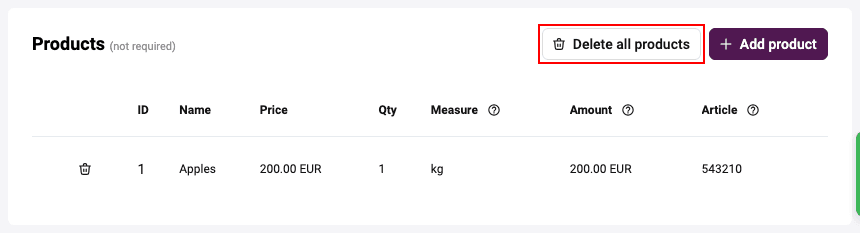
Repeat the required steps for each item in the shopping cart. If you need to delete the added product, click
 and confirm the action. If you want to delete the cart, click on the Delete all products button and confirm the action.
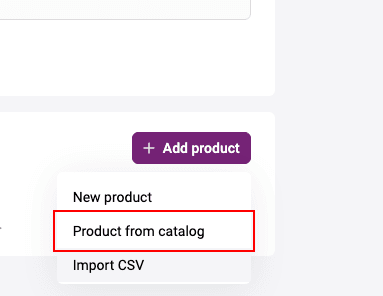
You can add items from the catalog, if you have previousy set up the product catalog. Click Add product, select Product from catalog, and then select the item in the opened window.
After adding a product item, you can edit it. To do this, click the item line and change the values in the editing form.
Having added all items to the shopping cart, issue an invoice to the customer.
Importing a CSV file
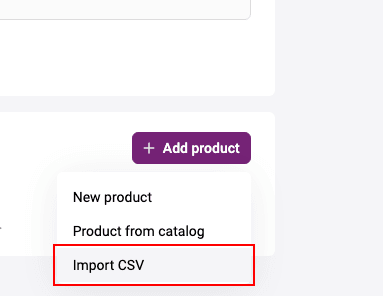
You can register an order (invoice) with a shopping cart and this cart can be populated automatically from a CSV file. To upload cart automatically, click on the Add product button and select Import CSV. In the window that opens, select the file to be uploaded on your device.
You can upload two types of files that can contain:
- only cart data (ORDER_BUNDLE)
- cart data (ORDER_BUNDLE) and order data (ORDER_PARAMS)
Please note, there are no mandatory fields and only certain fields can be mapped.
Possible cart data fields:
-
ItemCode— product code in the merchant system. -
Price— price per unit of a product item. -
Amount— payment amount in minimum currency units. Up to 12 symbols. -
Measure— units of measurement, e.g.: l — liters, pcs. — pieces. -
Quantity— the total number of product items of one PositionId and its measure. The description of its attributes is presented below. -
Name— name or description of the item or service.
Possible order data fields:
-
OrderNumber— order number (ID) in the merchant's system, must be unique for each merchant. -
TotalAmount— order amount plus fee, if any. -
Merchant— merchant login in the payment gateway. -
Currency— ISO 4217 encoded currency key. -
Language— ISO 639-1 encoded language key. If the language is not specified, the default language specified in the store settings is used. -
AuthType— Authentication type, possible values:0—PURCHASE,1—PRE_AUTH. -
Email— customer's email address. -
Phone— customer's phone number. -
Full name— customer's full name. -
INN— TIN. -
Passport— passport data. -
Sender— sender's email address. -
Description— Order description. -
ClientId— Customer number (ID) in the merchant's system — up to 255 characters. -
Payment period— set the date and time before the order is paid. For example, 5D– 5 days, 22H – 22 hours, 10M – 10 minutes.
Example with cart data:
ItemCode,Price,Amount,Measure,Quantity,Name
1,10,20,pieces,2,apples
Example with cart and order data:
Important: To ensure proper file processing, please make sure to avoid including commas within field values. Commas should only be used to separate fields and their corresponding values.
An example of incorrect field input in the file:
ItemCode,Name,Amount,Quantity,Measure,Price
123,apples,red,20000,1,kg,20000
Example of correct field input in the file:
ItemCode,Name,Amount,Quantity,Measure,Price
123,apples red,20000,1,kg,20000
Making a test transaction
You can independently test payment process on behalf of customer. To do this:
-
Generate invoice for customer.
-
Click Continue to open invoice details. Open payment page by following link at top of page.
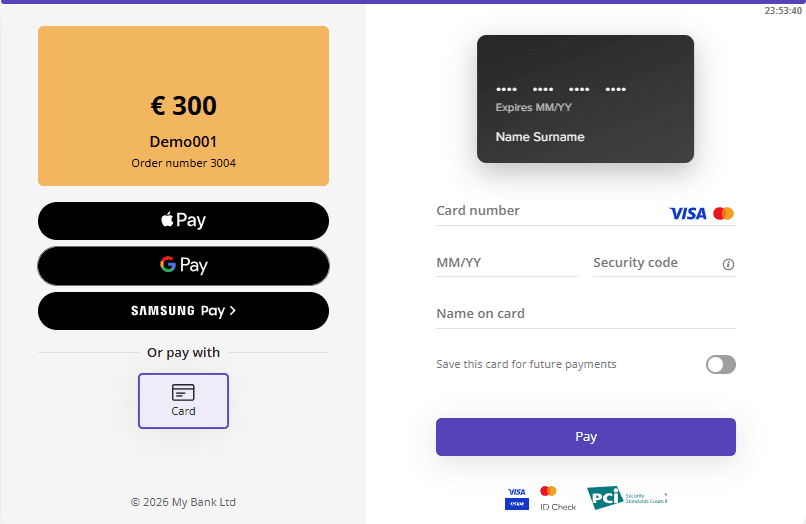
Select payment method. When paying by card, enter data of one of test cards.
Check Save this card for future payments if you want to store the credential: in this case entering card data will not be required next time.
Click Pay. To confirm operation use 3–D Secure code specified for test card.
Final page
After successfull payment, the client can optionally be redirected to the Final page. This page contains data about the payment and a link back to the store.
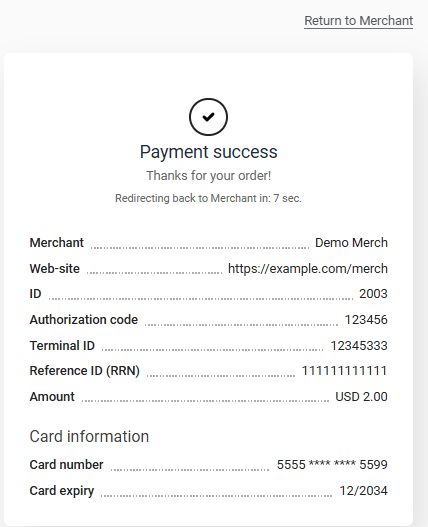
The table below describes the data displayed on the final page.
| Field | Description |
|---|---|
| Merchant | Merchant’s login. |
| Web-site | Merchant’s website address. |
| ID | Automatically generated order number in the merchant’s system. |
| Authorization code | International payment system authorization code (6 symbols). |
| Terminal ID | Terminal identifier in the system that processes the payment. |
| Reference ID (RRN) | Reference number of the payment authorization that has been assigned to it upon its registration. |
| Amount | Payment amount. |
| Description | Description of the payment. |
| Card information | Masked number and expiration date of the card used for payment. |
For the client to go back to the store, they would click the Return to Merchant link.
You can enable or disable showing the final page using the Show final page check box on the General settings page of your Personal Area. Read more here.
Invoice search by filter
At the top of Invoices page filters are located which allow you to find an invoice. To set search criteria, select needed values in the corresponding dropdown list.
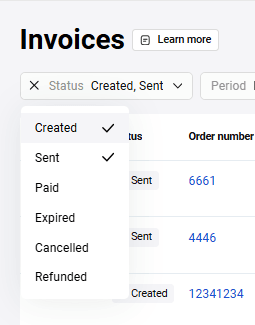
Following criteria are available:
-
Status — Invoice status. Following statuses are available (multiple selection):
-
Created. Invoice is issued but not yet sent to the customer.
-
Sent. Invoice is successfully sent to the customer, but not yet paid.
-
Paid. Invoice is paid.
-
Expired. Invoice payment period has expired. The corresponding transaction is declined.
-
Cancelled. Invoice is cancelled.
- Refunded. Partial refund was made.
-
Created. Invoice is issued but not yet sent to the customer.
- Period — Specify time interval. You can select period (for example, "Today", "This week") or set time interval by selecting start and end dates in calendar.
Invoice actions
View invoice information
To view invoice details, open Invoices page and click on needed invoice row.
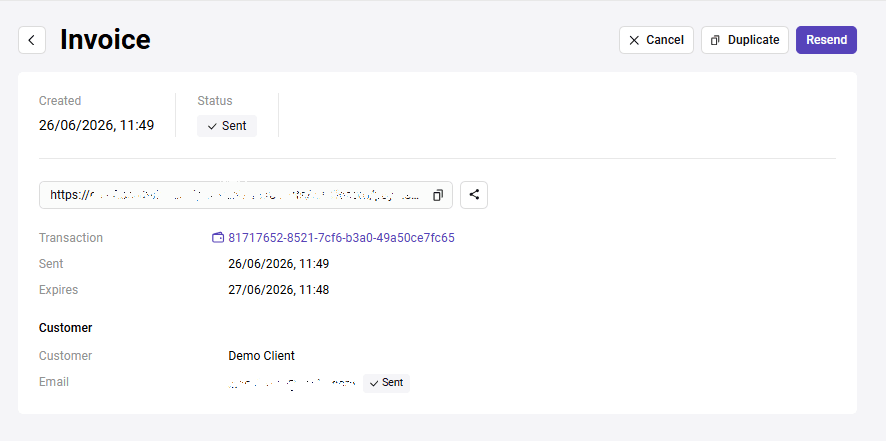
The following information is displayed on the invoice details page:
- Creation date, status and invoice amount
- Link to the payment page sent to the customer
- Transaction — link to the transaction details page related to this invoice
- Order number — order number in the store system
- Sent — date and time when the invoice was sent to the customer
- Expires — date before which the invoice must be paid
- Customer — customer's first name, last name, and middle name
- Email - customer's email for sending invoice
Buttons for cancelling, duplicating and resending invoice are also available. These actions are described below.
Invoice cancellation
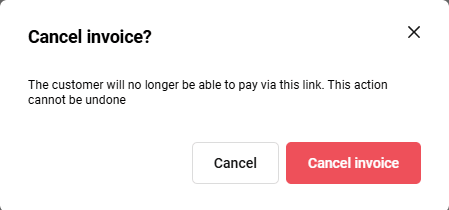
To cancel not yet paid invoice, on the invoice details page, click Cancel button. In the opened window, confirm cancellation.
Invoice duplication
You can duplicate invoice to create the same or similar invoice without entering all data again. To do this:
- On the invoice details page, click Duplicate button.
- A page for creating new invoice will open where all fields will already be filled with original invoice data. The Order number field will be empty.
- Enter new order number. Change other data if necessary.
- Click Create and send invoice.
As a result, a new invoice will be created and sent to the customer.
Invoice resending
To resend an already created invoice, on the invoice details page, click Resend button. In the opened window, confirm invoice resending.

Batch sending invoices by e-mail
If you have an appropriate permission, you can send multiple invoices at once to the customers by uploading a CSV file with invoice data and e-mails. The file format is defined by a template that is configured by the support team.
The example of the file content (amount, currency code, e-mail):

Uploading a batch file
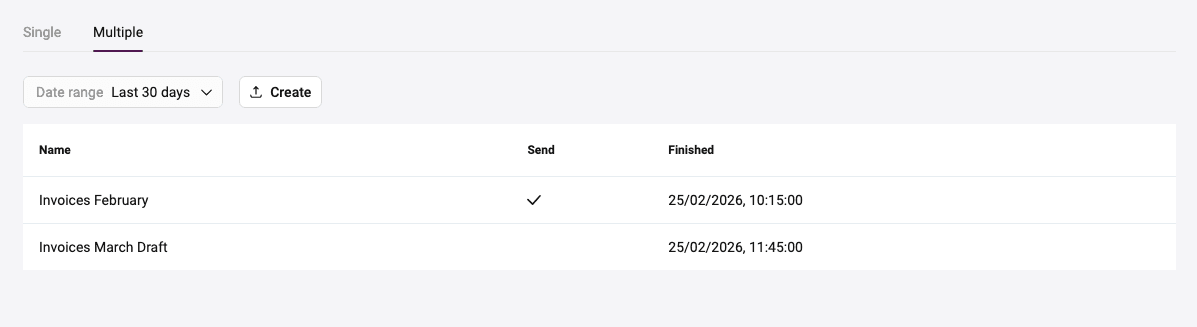
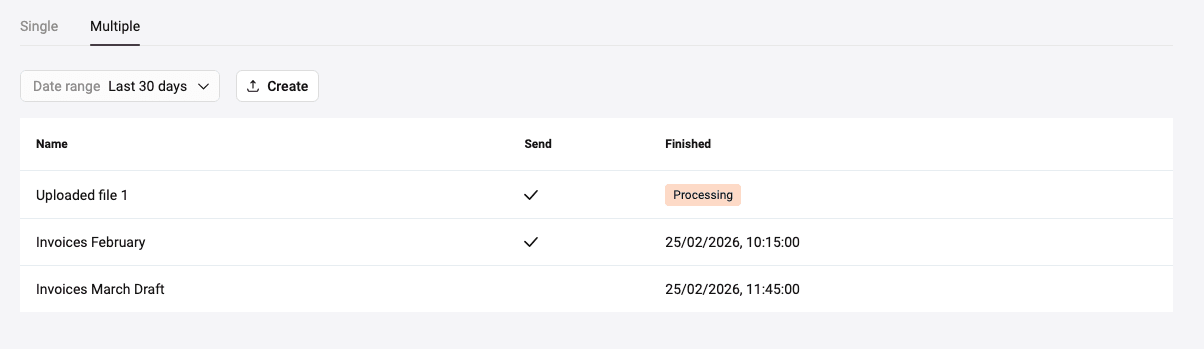
To upload a batch file, go to the Pay by Link section and open the Multiple tab. The page displays the list of already uploaded files (if they present).
Click Create. In the opened dialog, you can download the template for the file creation. Download the template and fill it in with the required values.
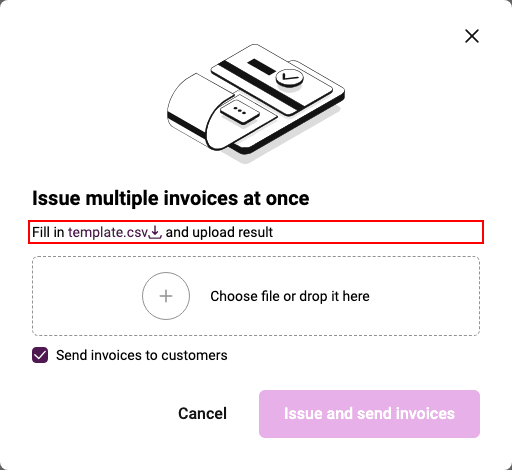
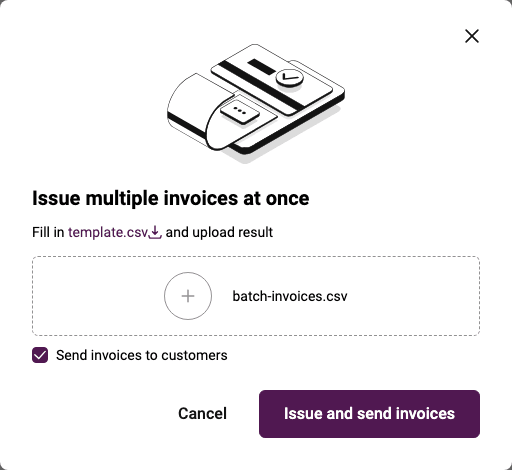
Choose the file or drag and drop it to the corresponding fields. If you want the payment links to be sent immediately to the customers, check the Send invoices to customers box, and then click Issue and send invoices. Otherwise, clear the Send invoices to customers box and click Issue invoices.
A new line with the uploaded file appears in the list of processed files. While the file is being generated, the "Processing" status is displayed in the Finished column. When the file is processed, this column displays the date and time when the file was processed. The Send column contains a checkmark if the payment links have been sent to the customers.
Viewing the details of the processed file
To view the content of the processed batch file, go to the Pay by link section, open the Multiple tab and click on the line of the uploaded file. A page opens with the details for each invoice.

The table contains the following columns with details for each invoice:
- Transaction — link to the transaction for the invoice
- Status — status of sending the invoice to the customer
- Order number — order number of the transaction
- Amount — transaction amount
- Email — email for sending the invoice
- Phone — customer phone
- Link — link to the payment page
Export of the processed file
To export the processed file, open the file details and click Export. The file will be exported to CSV with the following fields:
-
itemId— mandatory field, a number of the processed line from the file -
successful— mandatory field, success of the string processing (true / false) -
reason— mandatory field, error description (if there is no errors, the field is empty) -
link— mandatory field, generated payment link -
email— e-mail address specified on the upload (if this parameter was present in the template)
The output file may contain other fields if they were present in the template.