This page explains how to issue an invoice to a customer from Merchant Portal and is part of a comprehensive Merchant Portal user guide that is available here.
Pay by link
You can issue an invoice to the customer for payment for goods or services by e-mail. To do so, use the Invoice to e-mail section of the Merchant Portal. Once the invoice is issued, the customer receives an e-mail and follows the link in it to the payment page.
Sending a link to a payment page by e-mail
To invoice a customer and send them a link to the payment page by email, follow these steps.
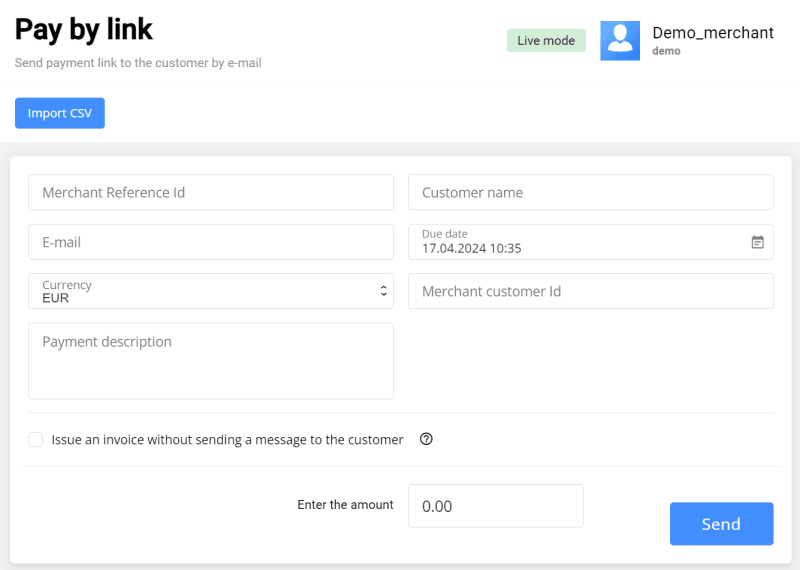
- Go to Invoice to e-mail section of the Personal Area. The page for entering the invoice parameters will be displayed:
-
Configure the settings referring to the table below.
Setting Description Merchant Reference Id Payment number in the store system. Customer name Customer's first name, last name, and patronymic. The data entered in this field is displayed in an email containing a link to the payment page. E-mail The e-mail address to which the payment link will be sent. Due date Indicate the date and time by which the payment can be made. After this date and time it will be impossible to pay the invoice. Merchant customer ID Customer number in your store’s system. If you specify this parameter, the customer will see the Save my card check box on the payment page. If the customer selects this check box, a credential will be stored after the payment is completed, and the customer will not have to enter the card data next time. Payment description Free-form description of the payment. Enter the amount Enter the payment amount here. If the session contains a shopping cart, the field value is populated automatically. Checkbox Press a checkbox "Issue an invoice without sending a message to the customer" to send a link by yourself

-
Upon successful dispatch, a link to the payment form will be displayed below:
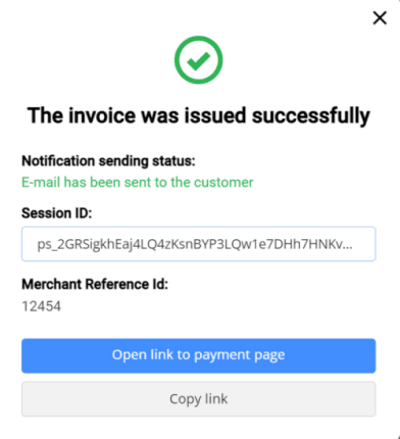
You can view the payment page sent to the customer by clicking on the Link to payment page button.
Adding a shopping cart to invoice
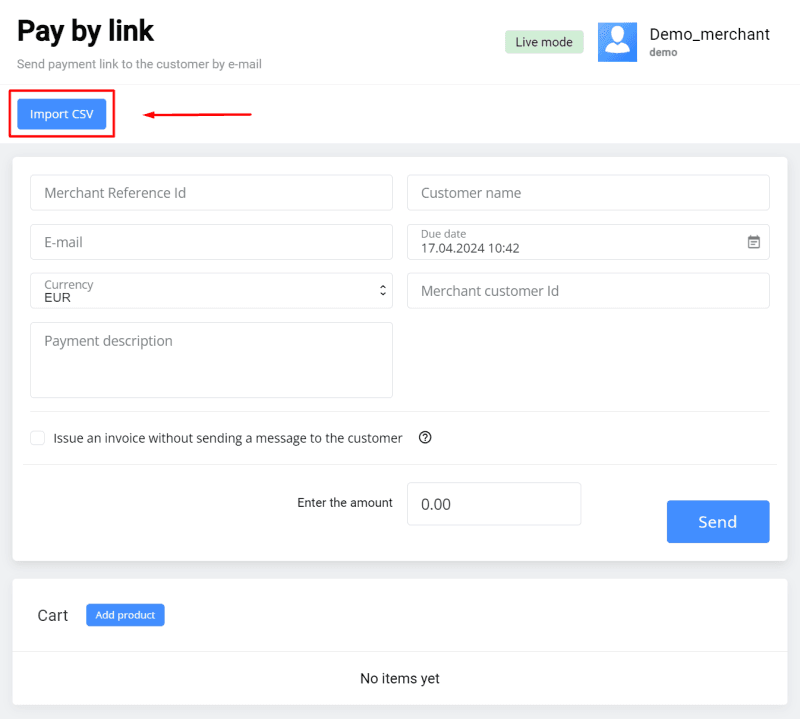
When generating an invoice you can add a shopping cart for the order. The Cart section is located under the area for creating a link to payment page:

- To add a line item to the shopping cart, click on the Add product button. A row with the parameters of the product being added will be displayed.
-
Fill in the required fields referring to the table below.
Field Description ID Identifier of a line item in the cart. Filled in automatically. Name Product/service name. Price Price of one product unit. Qty The number of units of the product. Measure Units of measurement, for example: L – liters, pcs. – pieces. Amount The total amount for specified line item. Calculated automatically when the Price and Qty fields are filled out. Article The vendor code of the line item. Repeat the required steps for each item in the shopping cart. If you need to delete the added row, click on the
 icon.
icon.
Having added all items to the shopping cart, invoice the customer.
Importing a CSV file
You can register a session (invoice) with a shopping cart and this cart can be populated automatically from a CSV file. To upload cart automatically, click on the Import CSV button. In the window that opens, select the file to be uploaded on your device.
Making a test payment
You can test the payment process on behalf of the customer. To do so:
- Create an invoice for the customer.
Go to the payment page by clicking on the Link to payment page button in the invoice-issued-successfully message.
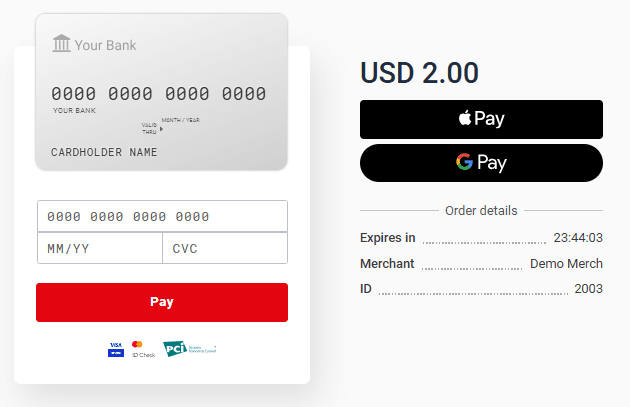
Enter the details of one of the test cards.
Select Save my card if you want to store the credential: in this case, you will not have to enter the card data next time.
Click on the Pay button. To confirm the transaction, use the 3-D Secure code specified for the test card.
Final page
After successfull payment, the customer can optionally be redirected to the Final page. This page contains data about the payment and a link back to the store.
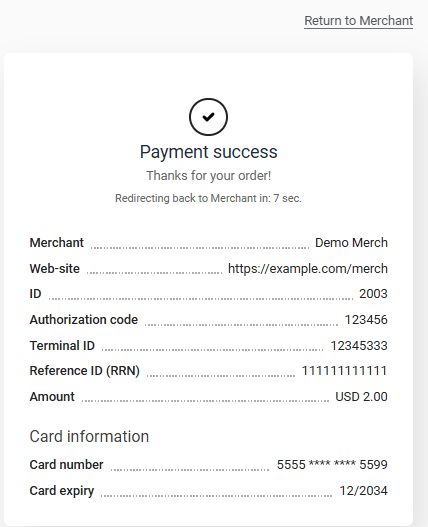
The table below describes the data displayed on the final page.
| Field | Description |
|---|---|
| Merchant | Merchant’s login. |
| Web-site | Merchant’s website address. |
| ID | Automatically generated payment number in the merchant’s system. |
| Authorization code | International payment system authorization code (6 symbols). |
| Terminal ID | Terminal identifier in the system that processes the payment. |
| Reference ID (RRN) | Reference number of the payment authorization that has been assigned to it upon its registration. |
| Amount | Payment amount. |
| Description | Description of the payment. |
| Card information | Masked number and expiration date of the card used for payment. |
For the customer to go back to the store, they would click the Return to Merchant link.
You can enable or disable showing the final page using the Show final page check box on the General settings page of your Personal Area. Read more here.
